
Oracle OCI - OAuth Configuration Manual
Navigating the Process
1. Navigate to https://cloud.oracle.com and inputting your tenancy name. Then, log in to the OCI platform after providing the credentials.
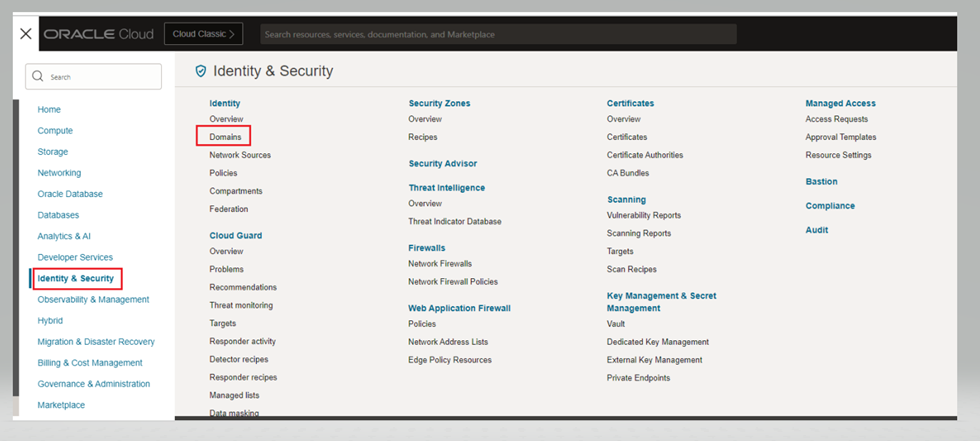
2. To access the Oracle IDCS console, proceed to "Identity & Security" and click on **"Domains."
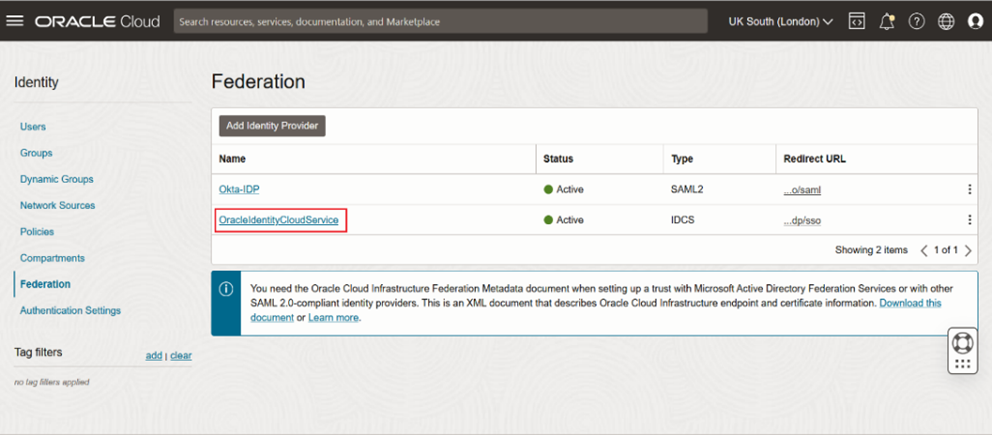
3. Open "OracleIdentityCloudService"
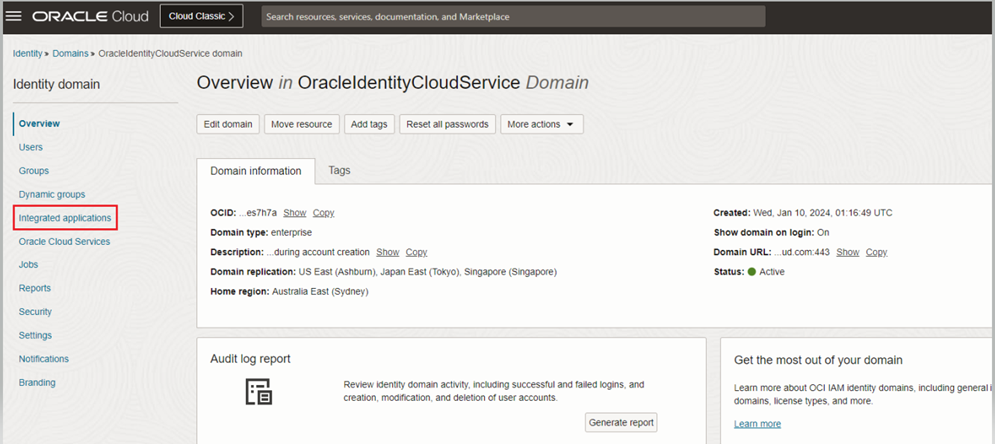
4. Click on Integrated Applications to create OAuth Confidential application.
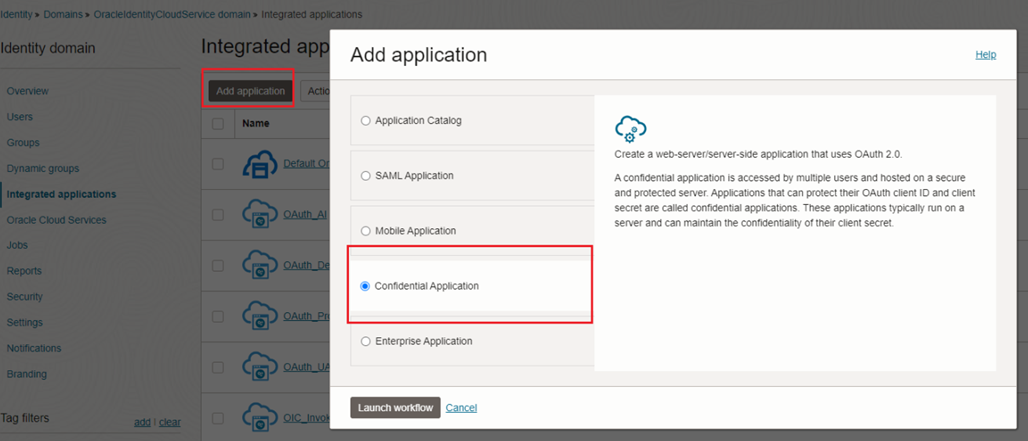
5. Click on “Add Application” and “Choose Confidential Application” and click on Launch Workflow.
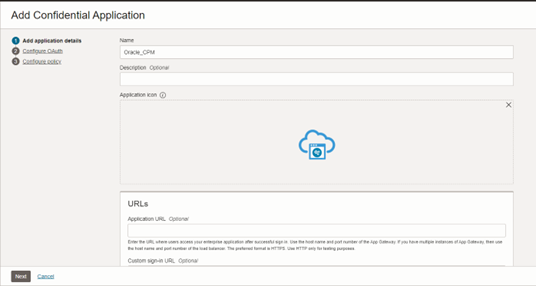
6. In Details tab enter name of application as Oracle <Your Env Name>\ and click Next
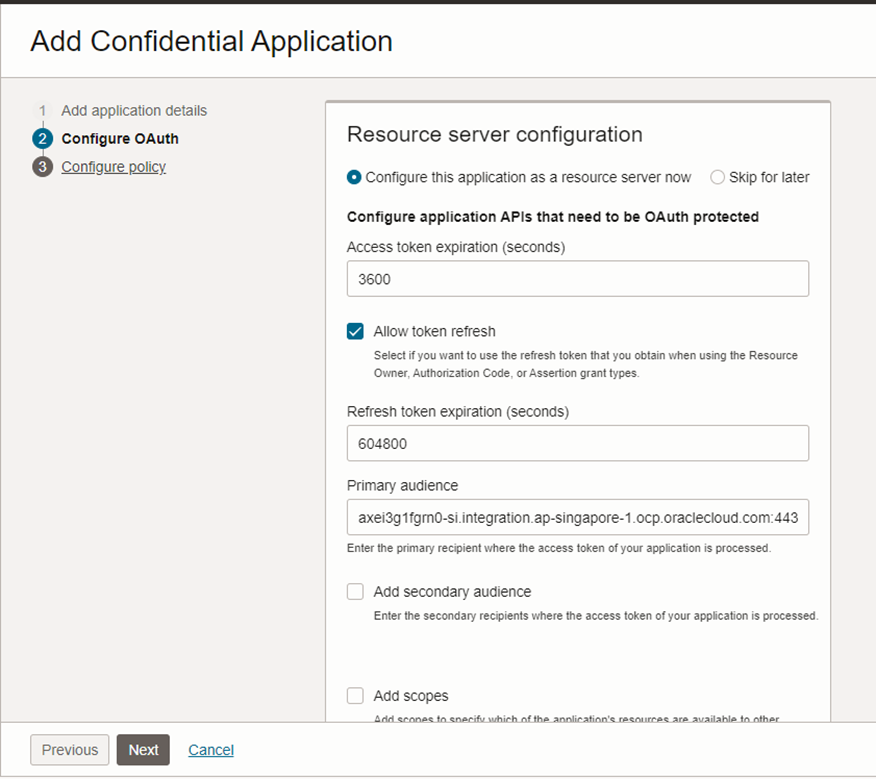
- Next click on Configure this applications as a resource server now and select **“**Access Token Expiration” with default values and Select Allow Refresh Tokens.
In the Primary Audience you need to add your respective OIC base URL without “https://”
E.g. - aoacsuatoic-axei3g1fgrn0-si.integration.ap-singapore-1.ocp.oraclecloud.com:443
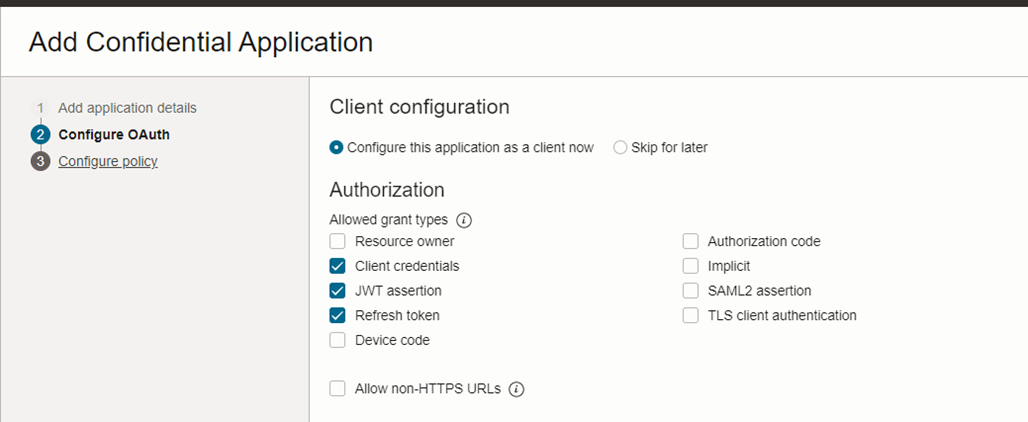
- Next Choose "Configure this application as a client now" and make below selections in Allowed Grant Types section.
Client Credentials”****"JWT Assertion"
“Refresh Tokens”
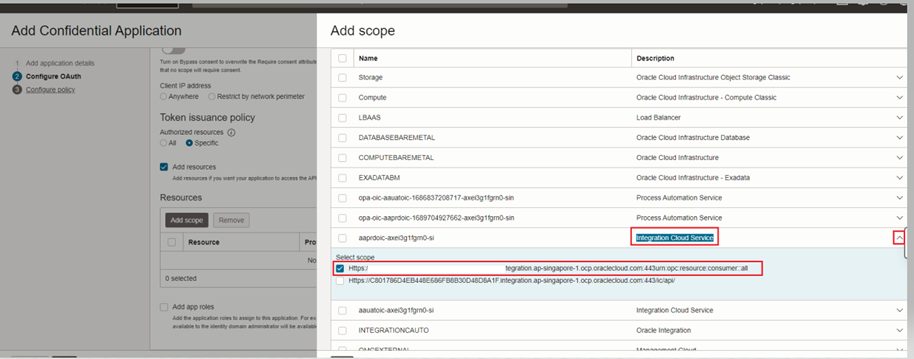
9. Then scroll down and in Token Issuance Policy and choose "Specific" Authorized Resources radio button then click on "+Add Resource" button and then click on “Add Scope” to add Prod OIC Service resource in scope.
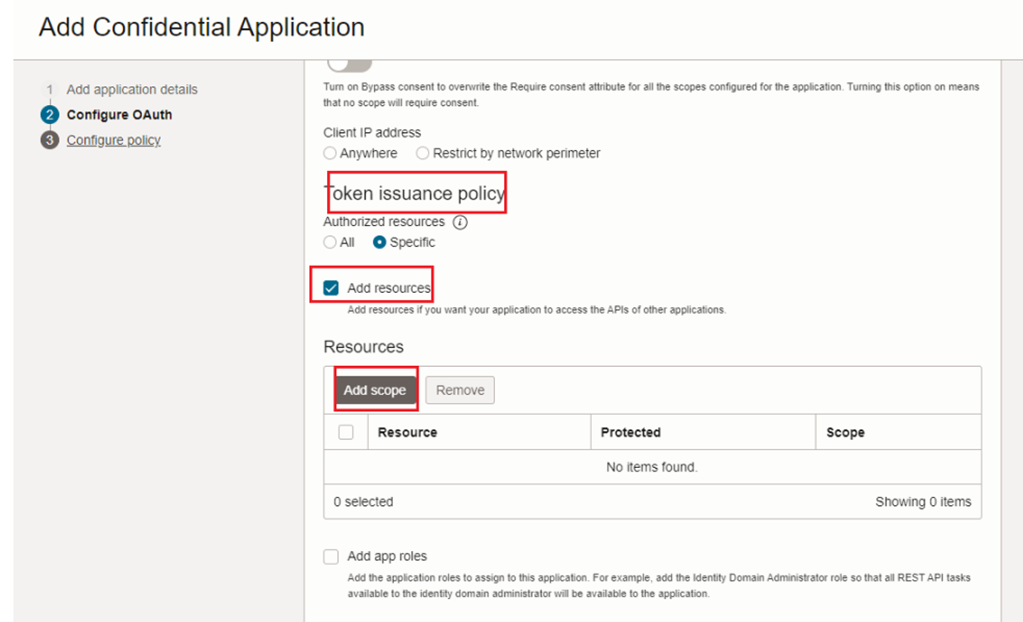
10. In Add Scope Section , Search for Description with Integration Cloud Service and choose the Production Instance. Click on the drop down on the right and choose resource:consumer:all URL resource .Click on "Add" button to complete the scope selection.
-
Next, Leave rest two tabs i.e. Web Tier Policy and Authorization tabs with default value and click on "Finish" button to complete the creation of the confidential application.
-
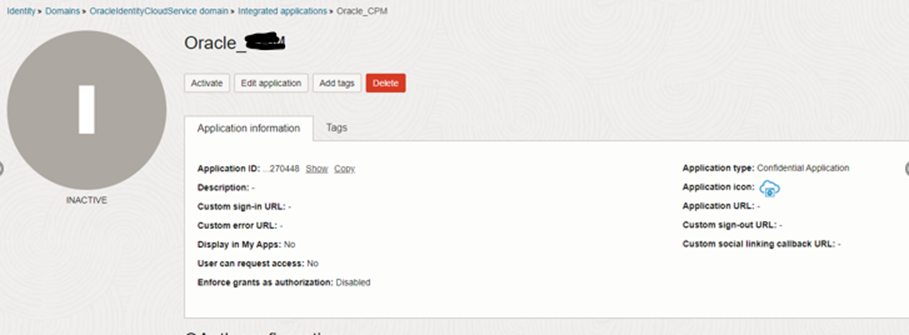
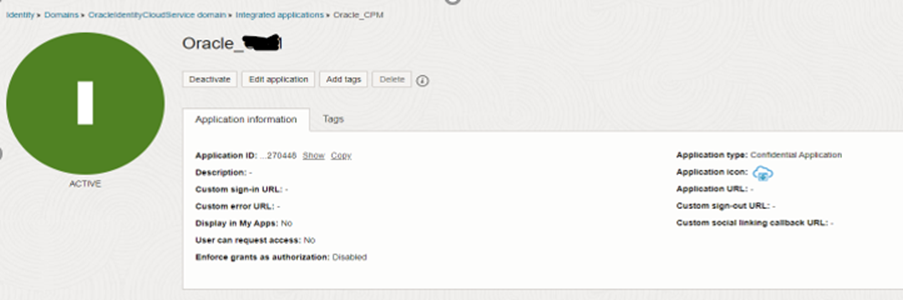
Activate confidential application by clicking on the "Activate" button on the top-right corner and click on the "OK" button on the alert shown. This will show the message in the green bar that the application has been activated.
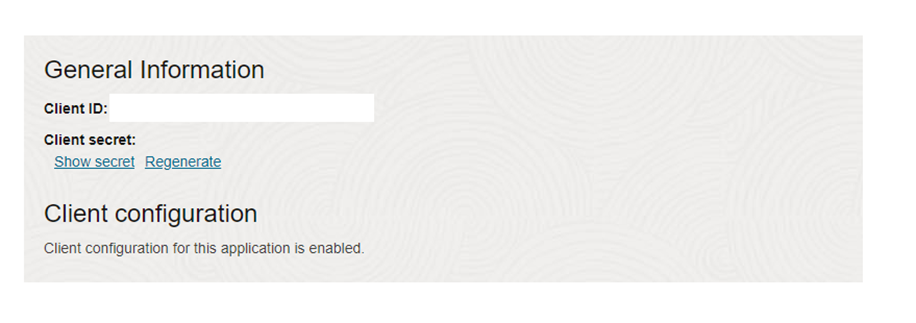
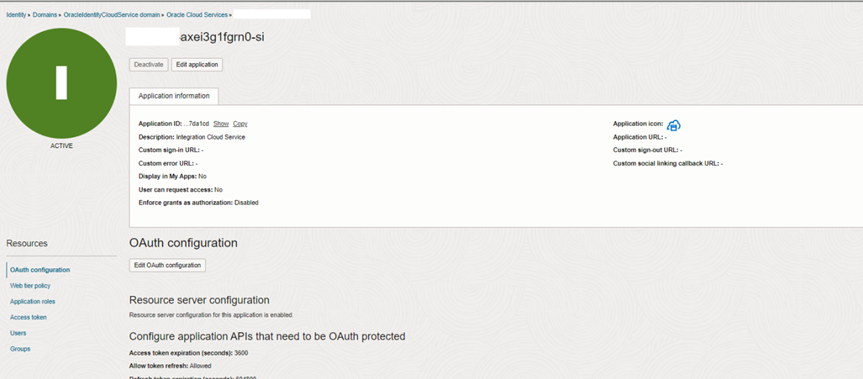
13. In "General Information" section Client ID is given. To show Client Secret click on "Show Secret" button. Note down these values which will be required to share at a later stage.
14. Next , Navigate to Overview and Click on "Oracle Cloud Services" and select the Production OIC instance. Open OIC service by clicking on the production environment service name.
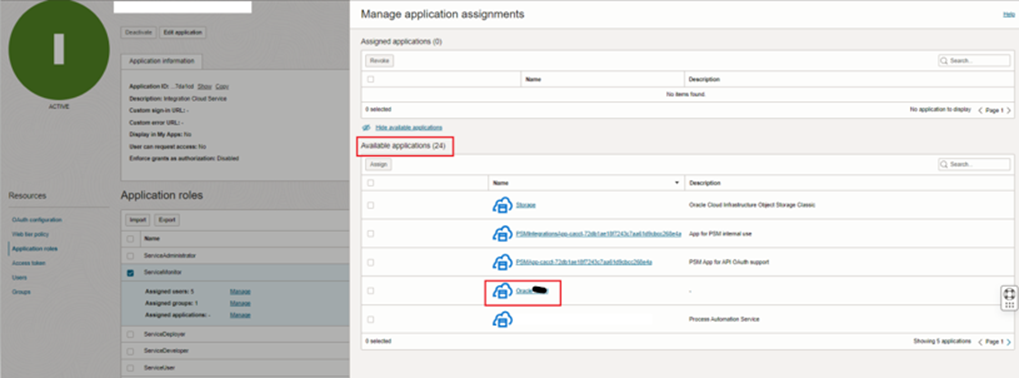
15. Go to "Application Roles" tab and click on menu icon on the right of "ServiceDeveloper" role and choose option "Assign Applications" and “Manage”
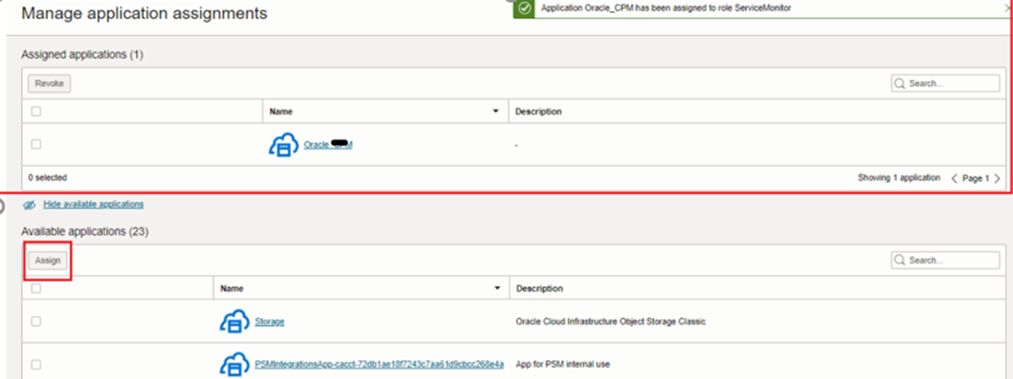
16. In the Manage Application Window , Click on Show Available Applications and search for Oracle <Your Env Name> Application , select and click on Assign
17. In "Assign Applications" window search confidential application created in previous steps, select the application and click on "OK".
We've successfully wrapped up the Oracle IAM configuration. We've generated a fresh confidential application for the client ,this application has been activated and is ready for action.
1 Important Info To Be Shared By Admin To Caller
1. Please Share the below information once all are configured to the caller.
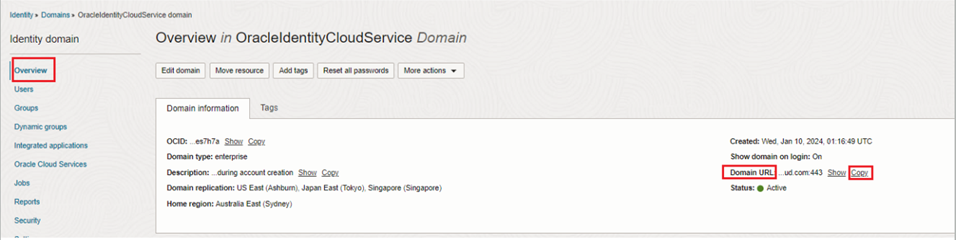
2. Oracle identity Cloud Service URL – Navigate to Overview Section and click on Copy on the Domain URL.
Get the below information by opening the confidential application that was created
3. Client ID
4. Client secret
5. Scope
6. Access Token URL – Please follow the below syntax.
https://OracleIdentityCloudService Base URL/oauth2/v1/token
7. Please note that Choose Client Authentication value should be Send as Basic Auth Header